
How to Program LiftMaster & Chamberlain Remotes to Garage Doors and Gates
Having trouble connecting your garage door or gate remote? Whether you're programming a single-button clicker or a multi-button Chamberlain remote, this comprehensive guide walks you through the entire process—from troubleshooting battery issues to successfully pairing your remote with the opener. Learn when to call a professional and how to avoid common pitfalls that could disconnect other tenants' remotes.
Introduction: Why Your Remote Might Not Be Working
Few things are more frustrating than pulling up to your garage or gated parking area only to find that your remote won't open the door. Before you assume the worst, know that most remote issues can be solved with simple troubleshooting and programming steps.
Whether you're dealing with a garage door opener or a gate access system, the process of connecting or reconnecting a remote follows similar principles. In this guide, we'll walk you through everything you need to know to get your remote working again.
Before You Begin: What You'll Need
Before starting any programming work, gather these items:
Your garage or gate remote
A ladder (for ceiling-mounted garage door openers)
A crescent wrench (for gate opener access)
Replacement batteries (if needed)
Notepad to record the opener brand and model
Important: If you're working with a gate opener in a multi-unit building, exercise caution. Resetting the system memory could disconnect all tenant remotes, creating a much bigger problem.
Part 1: Programming a Single-Button Garage Door Remote
Step 1: Test Your Existing Remote
When you arrive at the property, always test the remote first. Press the button and see if the garage door responds. If it does, you're all set—no programming needed.
If nothing happens, move to the next step.
Step 2: Check the Battery
Many remotes have a small indicator light that blinks when you press the button. If you don't see this light, the battery may be dead.
Here's what to do:
Open the remote casing
Remove the battery and reinsert it to test the connection
If there's still no light, replace the battery with a new one
Test the remote again
If the remote still doesn't work after a fresh battery, it may be time to purchase a compatible replacement remote. Note the brand and model of your garage door opener (LiftMaster, Chamberlain, Genie, etc.) and ask a hardware store employee which remote will work with your system.
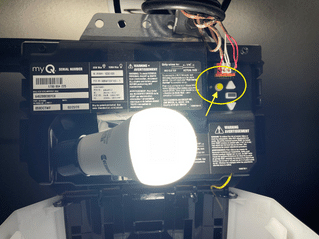
Step 3: Locate the Learn Button
The Learn Button is your key to programming any remote to a garage door opener. This small colored button (typically yellow, purple, or red) is usually located on the opener unit itself.
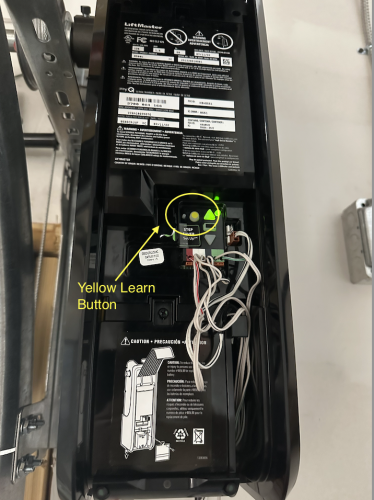
Where to find it:
Ceiling-mounted openers: Look on the back or side of the motor unit
Wall-mounted openers: Check near the garage door opening on the wall-mounted control panel
You may need a ladder to access ceiling-mounted units safely.
Step 4: Program the Remote
Once you've located the Learn Button, follow these steps:
Press the Learn Button once—you should see a light next to it start blinking (usually yellow or the same color as the button)
Within 30 seconds, press the button on your remote that you want to use for this garage door
Listen for a click from the garage door opener—this confirms the remote has been successfully paired
Test the connection by pressing the remote button again—the garage door should open or close
Congratulations! Your remote is now programmed and ready to use.
Part 2: Programming a Gate Opener Remote
Gate openers follow a similar process, but accessing the Learn Button requires a bit more work.
Step 1: Test Your Existing Remote
Just like with garage doors, start by testing whether the remote already works. If it opens the gate, you're done.
If not, check the battery using the same troubleshooting steps outlined above.
Step 2: Gain Access to the Gate Opener
Gate openers are typically located inside the gated area, which means you'll need to enter through the building if your remote isn't working.
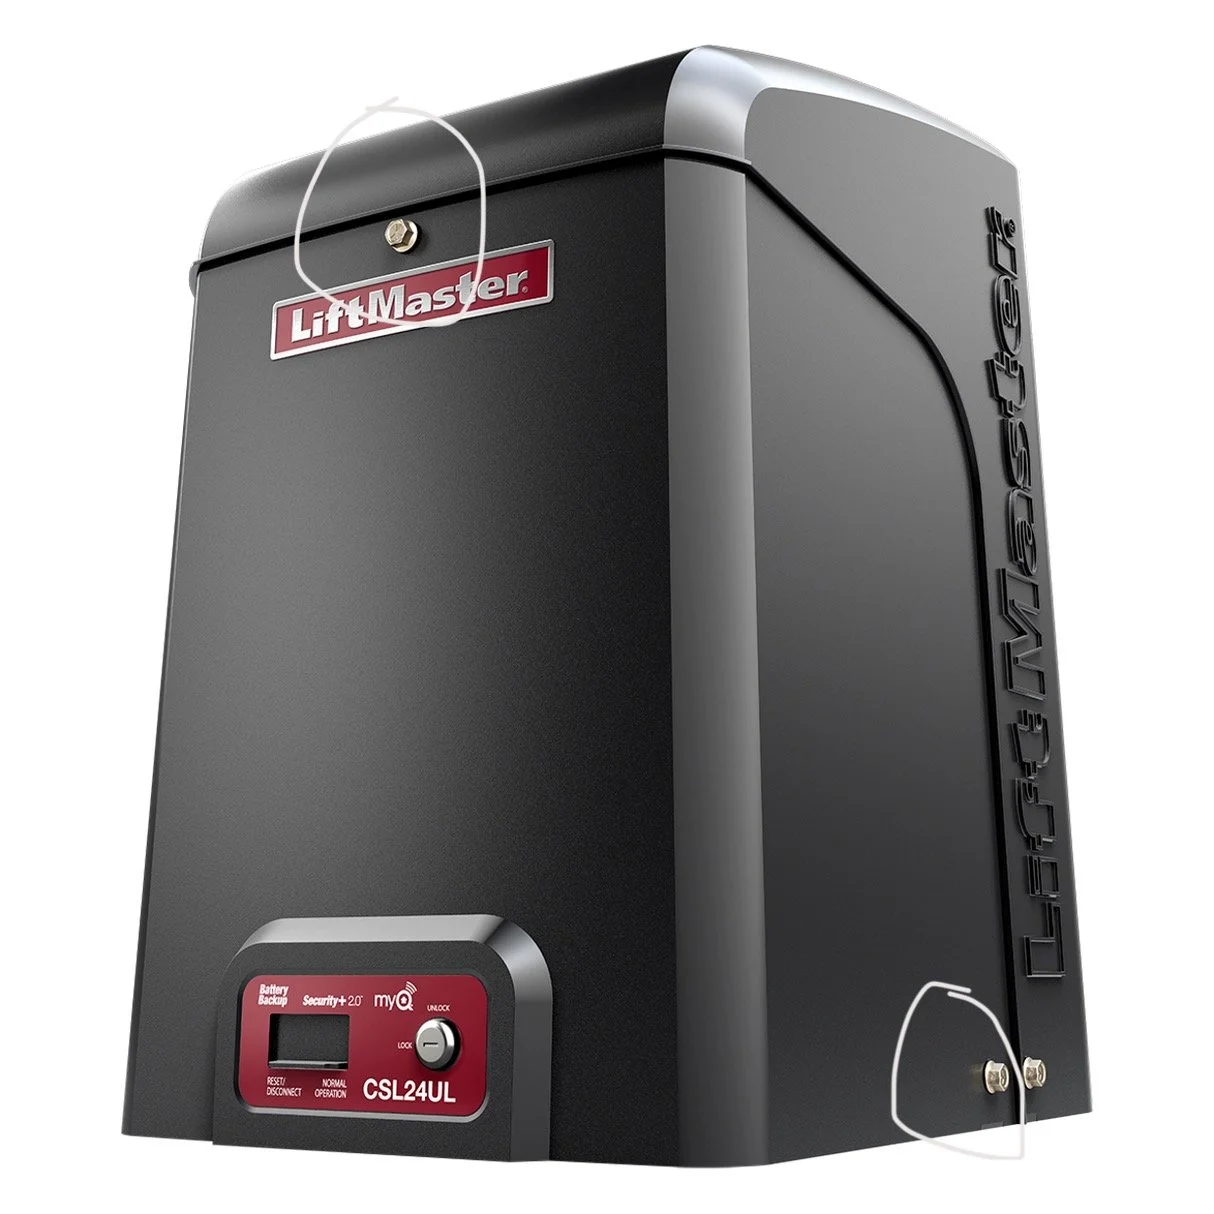
The opener unit is usually housed in a weatherproof box. To access the control panel inside:
Locate the mounting screws—there's typically one at the top center and one on each side near the bottom
Use a crescent wrench to remove these screws
Remove the weatherproof sheath to expose the control panel
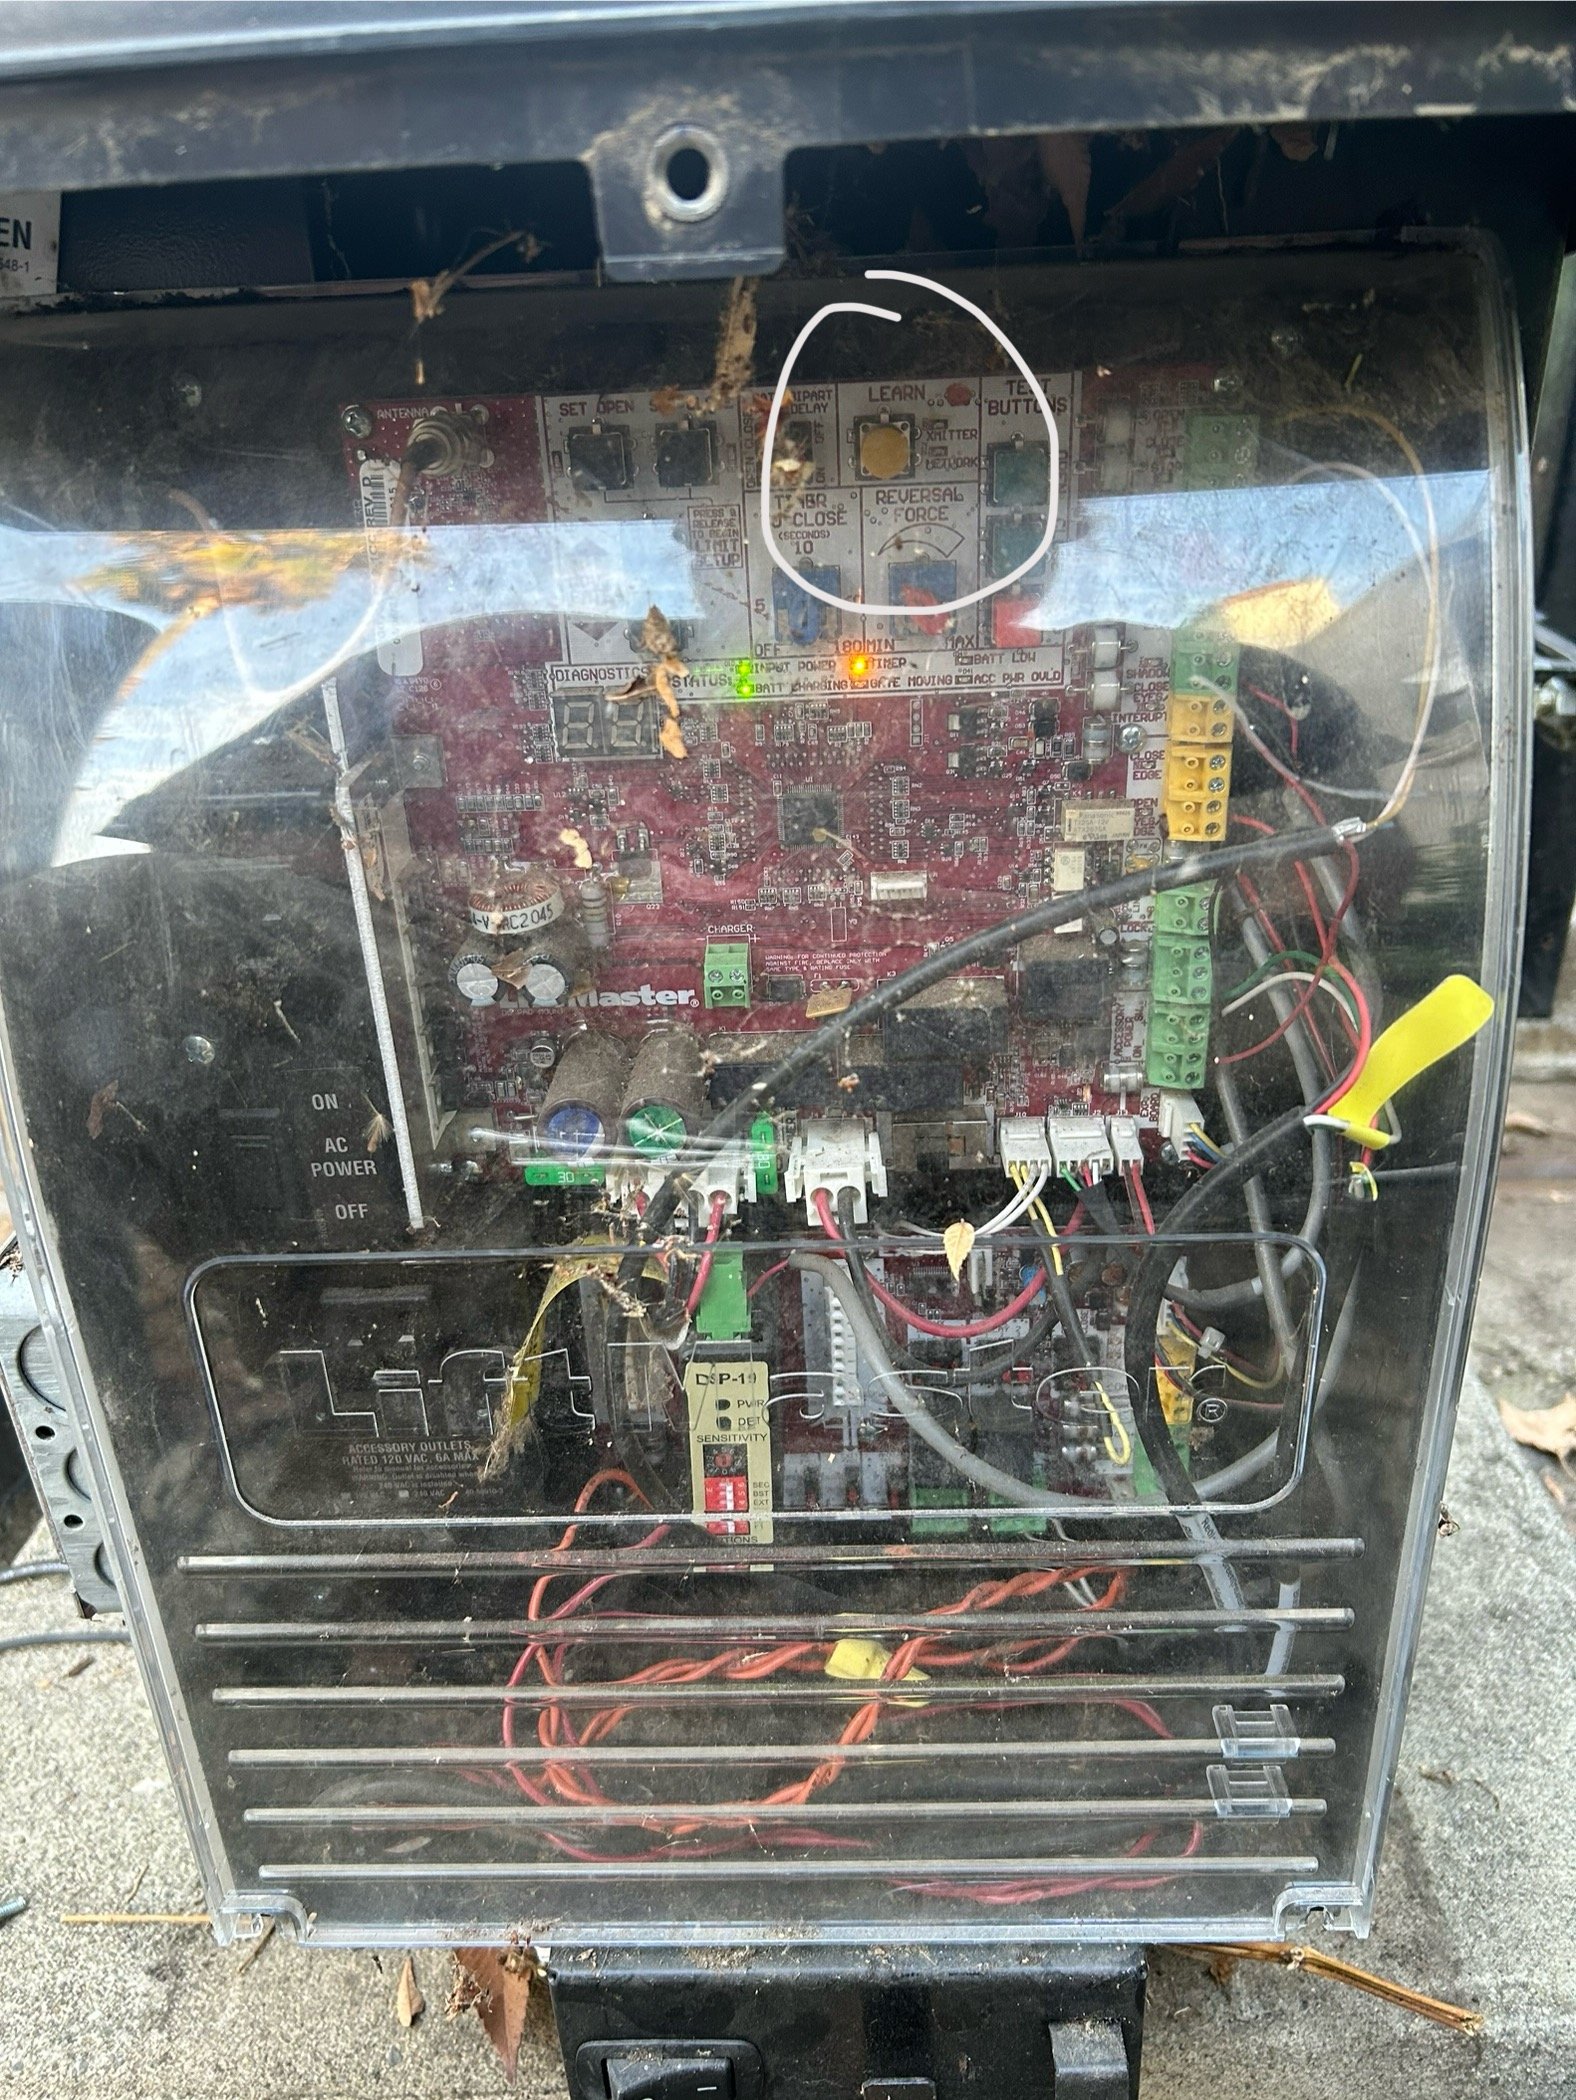
Unscrew the clear plastic cover over the electronics (usually 1-2 screws at the bottom)
You should now see the circuit board and control buttons.
Step 3: Locate and Press the Learn Button
Inside the control panel, you'll find a Learn Button (typically yellow and clearly labeled).
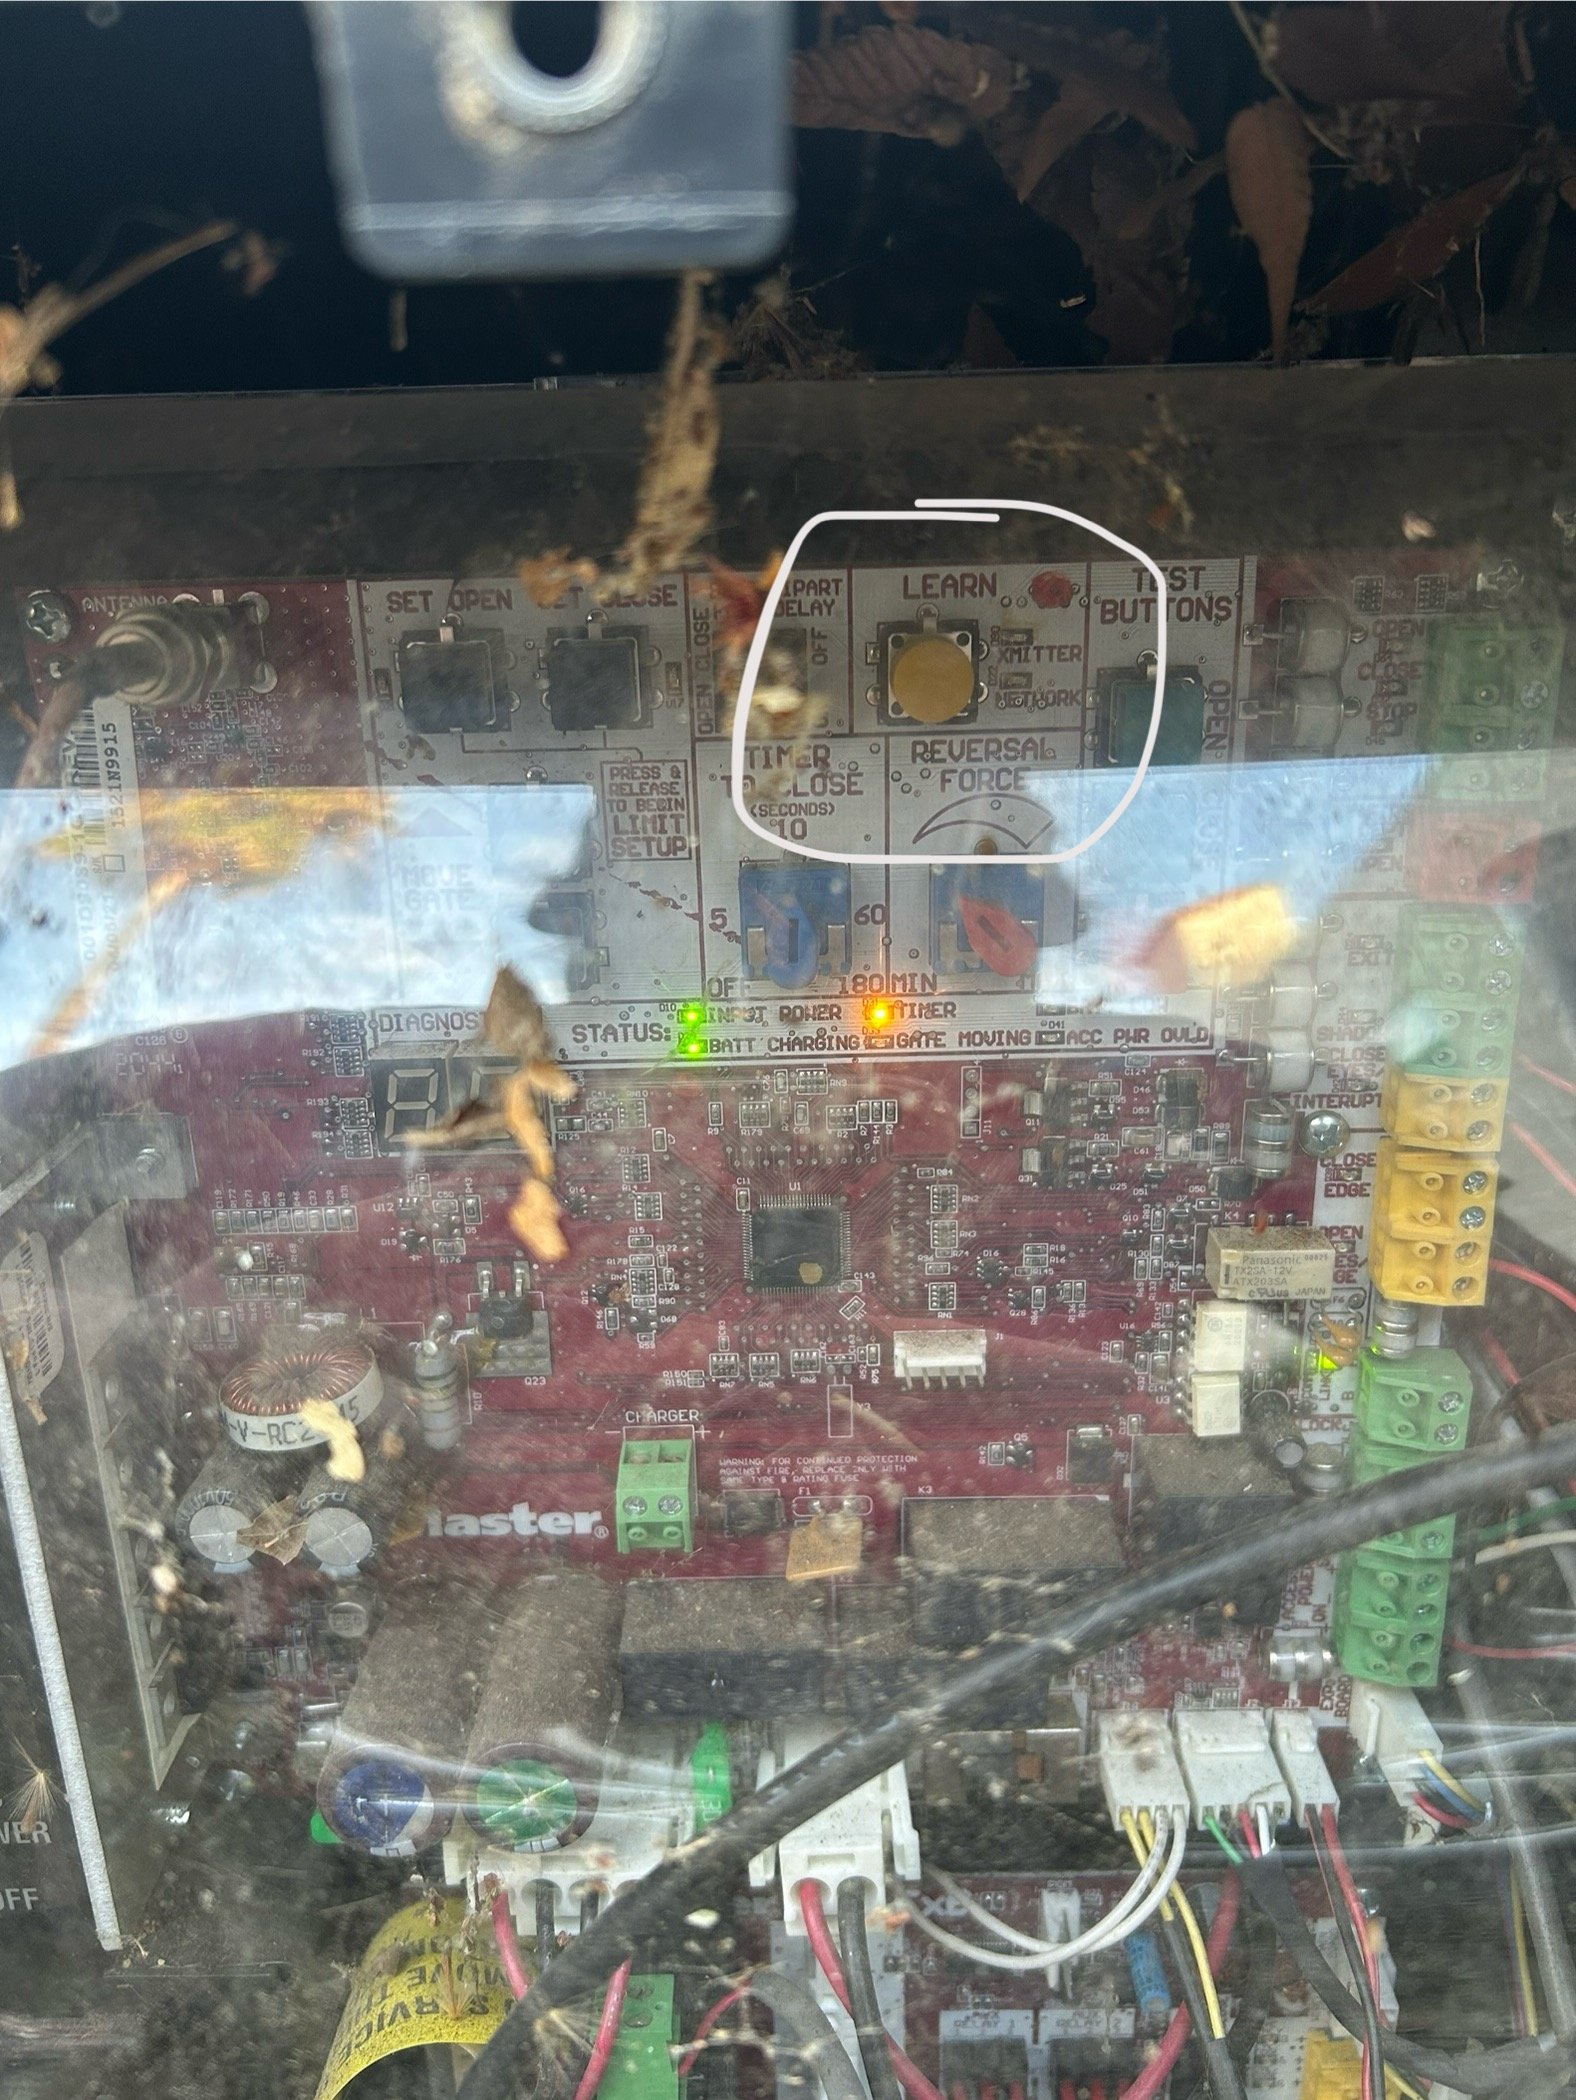
Follow these steps:
Press the Learn Button—you should hear a chirping sound
Immediately press and hold the desired button on your remote until you hear a second chirp
Release the button—the remote is now paired
Test the connection by pressing the remote button again—the gate should open
Step 4: Reassemble the Gate Opener
Once programming is complete, replace the clear plastic cover, reattach the weatherproof sheath, and secure all screws. This protects the electronics from weather damage.
Part 3: Programming Multi-Button Chamberlain/MyQ/LiftMaster Remotes
If you're working with a Chamberlain, MyQ, or LiftMaster 3-button remote, the pairing process is slightly different.
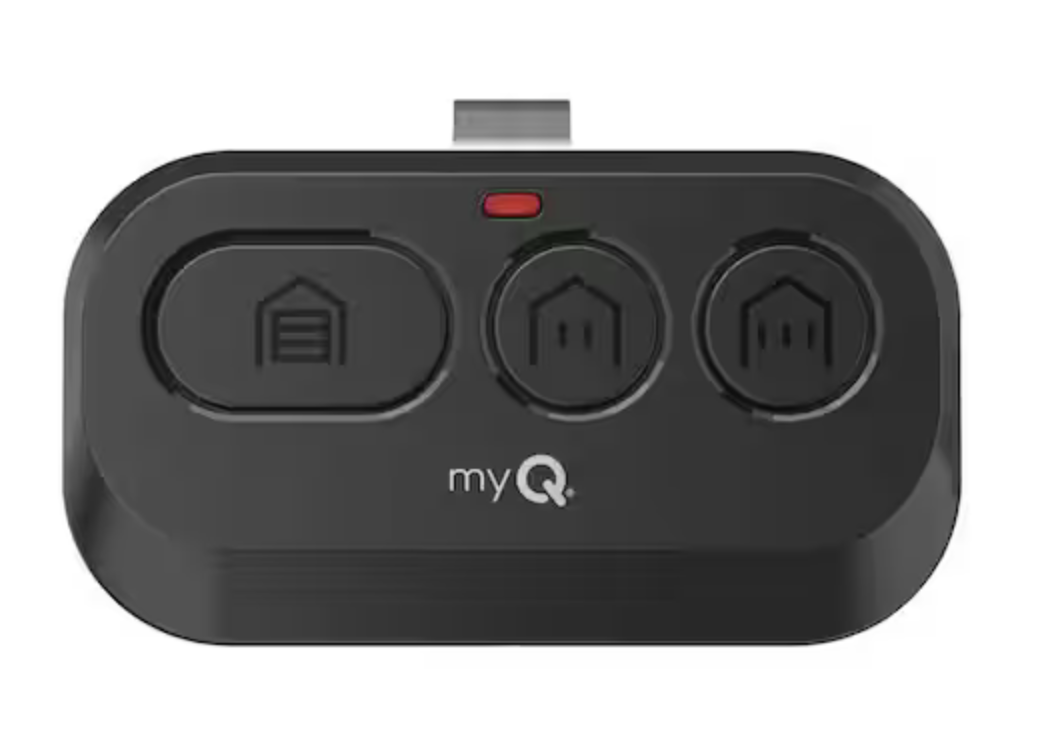
The Programming Steps
Hold down the two smaller buttons on the right side of the remote simultaneously until the indicator light changes from flashing to solid
Press the Learn Button on the garage door opener or gate opener—you'll hear a chirp
Press your desired button twice (the one you want to program)—this triggers a chirp from the opener and the door/gate will begin to open
As soon as the door/gate starts opening, press any OTHER button on the remote (not the one you just programmed)
Test your work by pressing the programmed button—it should open and close the door/gate
This sequence successfully pairs your multi-button remote to the system.
Troubleshooting: When Your Remote Won't Connect
Clearing the Memory on a Garage Door Opener
If you've tried everything and the remote still won't connect, you can reset the opener's memory. However, only do this for single-unit garage door openers, not shared gate systems.
Here's how:
Locate the Learn Button on the garage door opener
Press and hold the Learn Button for approximately 6 seconds
Watch for the indicator light to go out—this means the memory has been cleared
Release the button and follow the standard programming steps to add your remote
Critical Warning: Do NOT clear the memory on gate openers in multi-unit buildings. These systems store dozens of tenant remotes, and clearing the memory will disconnect everyone's access—creating a major problem for residents and property management.
When to Call for Professional Help
If you've exhausted all troubleshooting steps and your remote still won't connect, it's time to contact the manufacturer or a professional technician.
For LiftMaster/Chamberlain systems, you can reach technical support at:
Phone: 800-528-6563
Hours: Monday–Friday, 7:00 AM – 7:00 PM EST
They can provide model-specific guidance and help diagnose hardware issues that may require replacement parts.
Conclusion: Keeping Your Access Systems Running Smoothly
Programming garage door and gate remotes doesn't have to be complicated. By following these step-by-step instructions, you can quickly restore access to your property and avoid costly service calls for simple battery or programming issues.
Remember these key points:
Always test the remote and battery first
Never reset gate opener memory in multi-unit buildings
Keep track of your opener's brand and model for future reference
Know when to call a professional for complex issues
Need Professional Assistance?
Not sure if your garage door opener or gate system is functioning properly? Our experienced technicians can diagnose issues, program remotes, and ensure your access systems are secure and reliable.
Give us a call today to schedule an inspection or service appointment. We're here to help keep your property accessible and secure.