
How to Replace a Light Fixture Safely: A Complete Step-by-Step Guide
Replacing a light fixture is one of the most common DIY electrical projects, but it requires careful attention to safety. This guide walks you through the entire process—from turning off the power to testing your new installation—so you can upgrade your lighting with confidence. Learn proper wire identification, connection techniques, and what to do when there's no ground wire.
Introduction: When to Replace Your Light Fixture
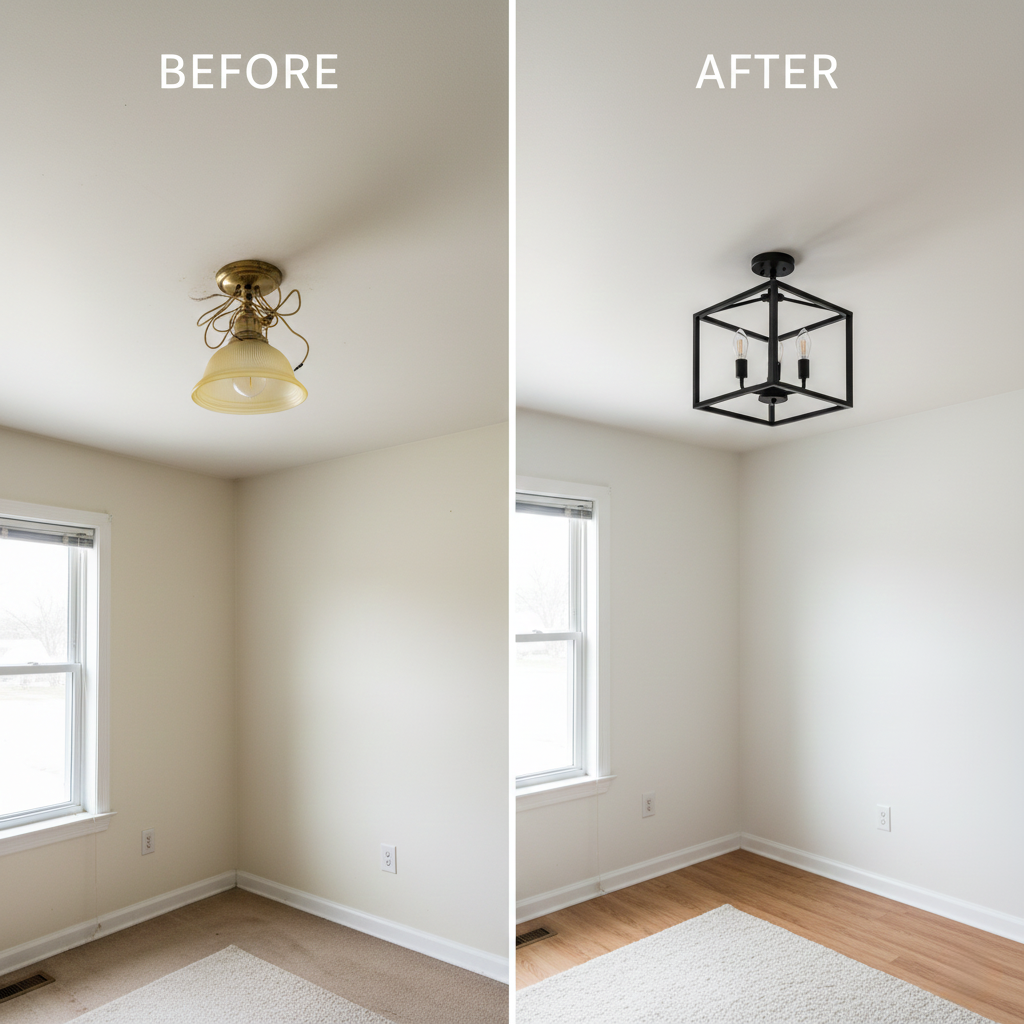
Outdated light fixtures can make even a well-maintained home feel dated. Whether you're modernizing a rental property or upgrading your own space, replacing a light fixture is a manageable project that delivers immediate visual impact.
However, working with electricity requires respect and caution. This guide will show you the safest way to remove an old fixture and install a new one, even if you've never tackled an electrical project before.
Safety First: What You Need Before You Begin
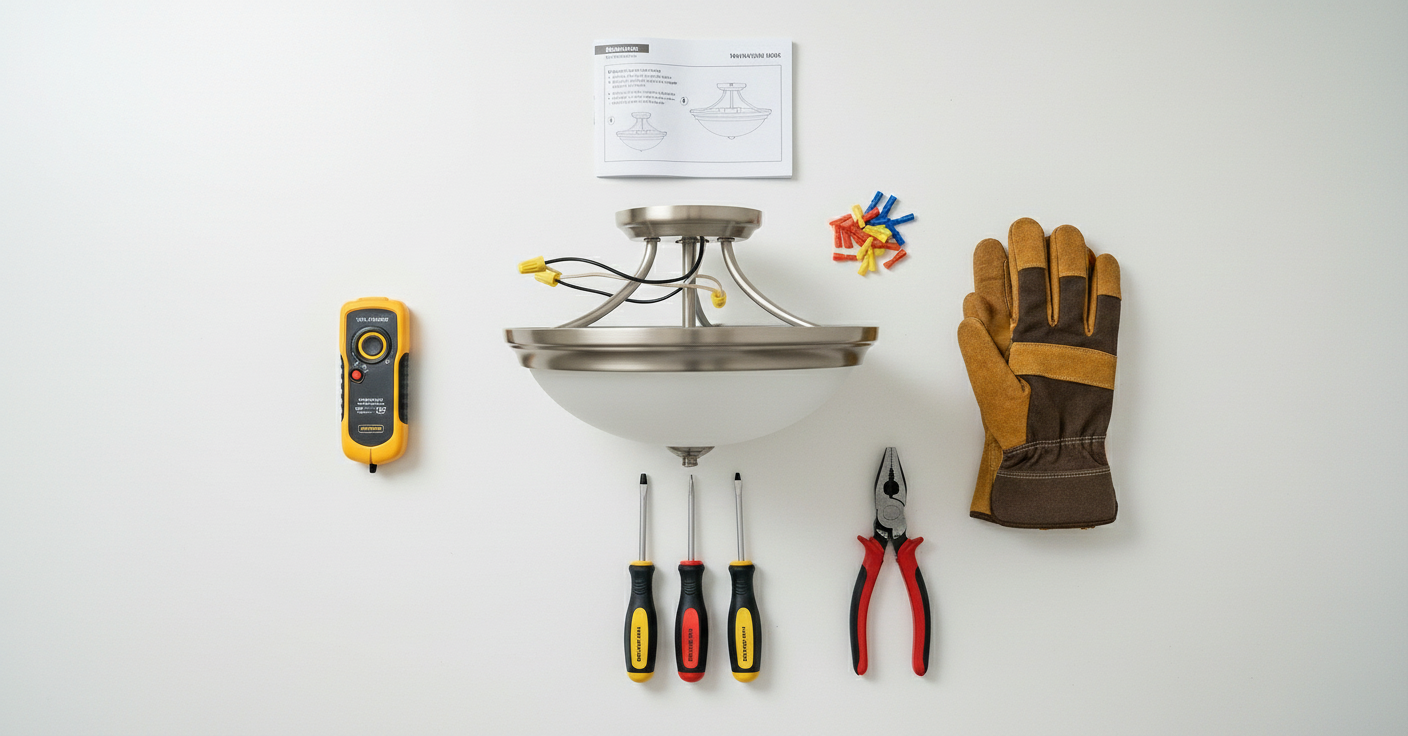
Required Tools and Materials
New light fixture with mounting hardware
Electrical tester (non-contact voltage tester)
Screwdriver (Phillips and flathead)
Wire strippers (if needed)
Wire nuts (usually included with new fixture)
Ladder or step stool
Work gloves
Critical Safety Equipment
An electrical tester is non-negotiable for this project. This inexpensive tool allows you to verify that power is truly off before touching any wires. Never rely on the light switch alone—always test the wires.
Step 1: Turn Off the Power
Before touching anything, you need to cut power to the light fixture. Here's how:
Locate Your Electrical Panel
Find your home's main electrical panel or sub-panel. In most homes, this is located in the garage, basement, utility room, or an exterior wall.
Look for labels: In a perfect world, your panel will be clearly labeled with circuit descriptions like "Master Bedroom Lights" or "Kitchen Ceiling Fan." If your panel is labeled, simply flip the breaker that controls your light fixture to the "OFF" position.
If your panel isn't labeled: You have two options—flip breakers one at a time and test the light switch until the fixture goes dark, or proceed with extreme caution knowing the wires will still be live.
⚠️ SAFETY WARNING
If you cannot turn off the power at the breaker, you are working with live electricity. The wires can deliver a potentially fatal shock. We strongly recommend hiring a licensed electrician for this work. If you choose to proceed, you must be exceptionally careful not to touch any bare copper wire, especially the Hot wire (black or red).
Step 2: Remove the Old Light Fixture
Once the power is off, you can safely remove the existing fixture.
Locate the Mounting Screws
Most light fixtures are secured with visible screws that are part of the design:
Side-mounted screws: Look for decorative knobs or screws on either side of the fixture base
Center-mounted screw: Some fixtures have a single screw in the middle of the base plate
Remove the Fixture from the Wall or Ceiling
Unscrew the mounting hardware carefully
Gently pull the fixture away from the wall or ceiling—the wires will still be connected, so don't pull too hard
You should now see three sets of wires connected with wire nuts (plastic caps that twist onto the wires)
Step 3: Test for Live Power
Even if you turned off the breaker, always verify that the power is truly off.
Use Your Electrical Tester
Hold your non-contact voltage tester near the Hot wire (black or red). If the tester beeps or lights up, power is still flowing to the fixture. Go back to the panel and turn off the correct breaker.
If there's no alert from your tester, you're safe to proceed.
Step 4: Disconnect the Old Fixture
Now that you've confirmed the power is off, you can disconnect the wiring.
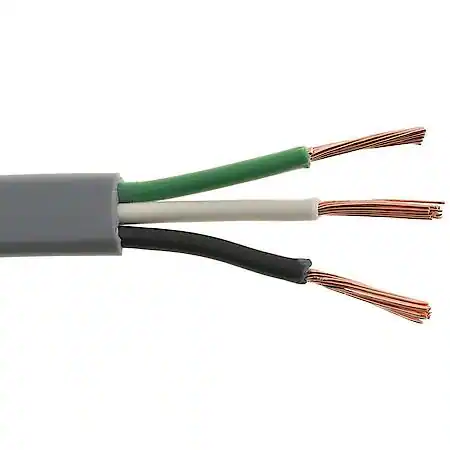
Understanding Wire Colors
You'll see three types of wires:
Ground wire: Bare copper or green—this is your safety wire
Neutral wire: White—this completes the electrical circuit
Hot wire: Black or red—this carries the electrical current
Disconnection Order
If power is off (recommended):
Unscrew the wire nuts in any order and separate the fixture wires from the house wires.
If power is still on (not recommended but sometimes necessary):
Unscrew the wire nuts in this specific order to minimize shock risk:
Neutral wire (white) first
Hot wire (black or red) second
Ground wire (bare copper or green) last
Important: Never touch the bare copper ends of any wires, especially the Hot wire. Always twist the wire nuts back onto the loose house wires after you remove the fixture. This prevents accidental contact while you work.
Step 5: Prepare the New Fixture
Before installing, familiarize yourself with your new fixture's components.
Most modern fixtures come with:
Mounting bracket (attaches to the electrical box)
Wire leads with pre-stripped ends
Wire nuts for connections
Decorative base plate
If your fixture has a mounting bracket, install it to the electrical box first using the provided screws.
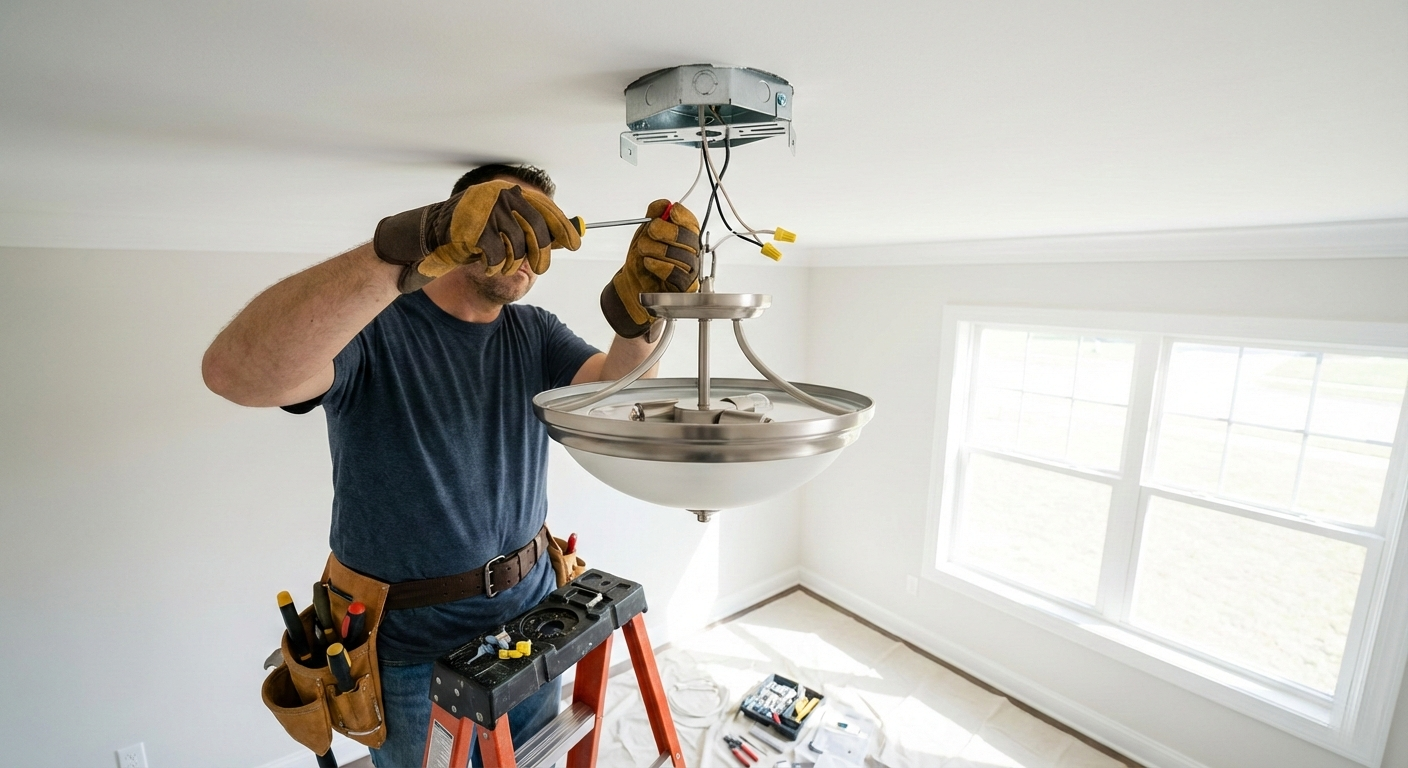
Step 6: Connect the New Fixture
Now comes the crucial step—making safe, secure electrical connections.
Connection Order (Always Follow This Sequence)
Connect the wires in this order for maximum safety:
Ground wire (bare copper or green) first
Neutral wire (white) second
Hot wire (black or red) last
How to Make Secure Connections
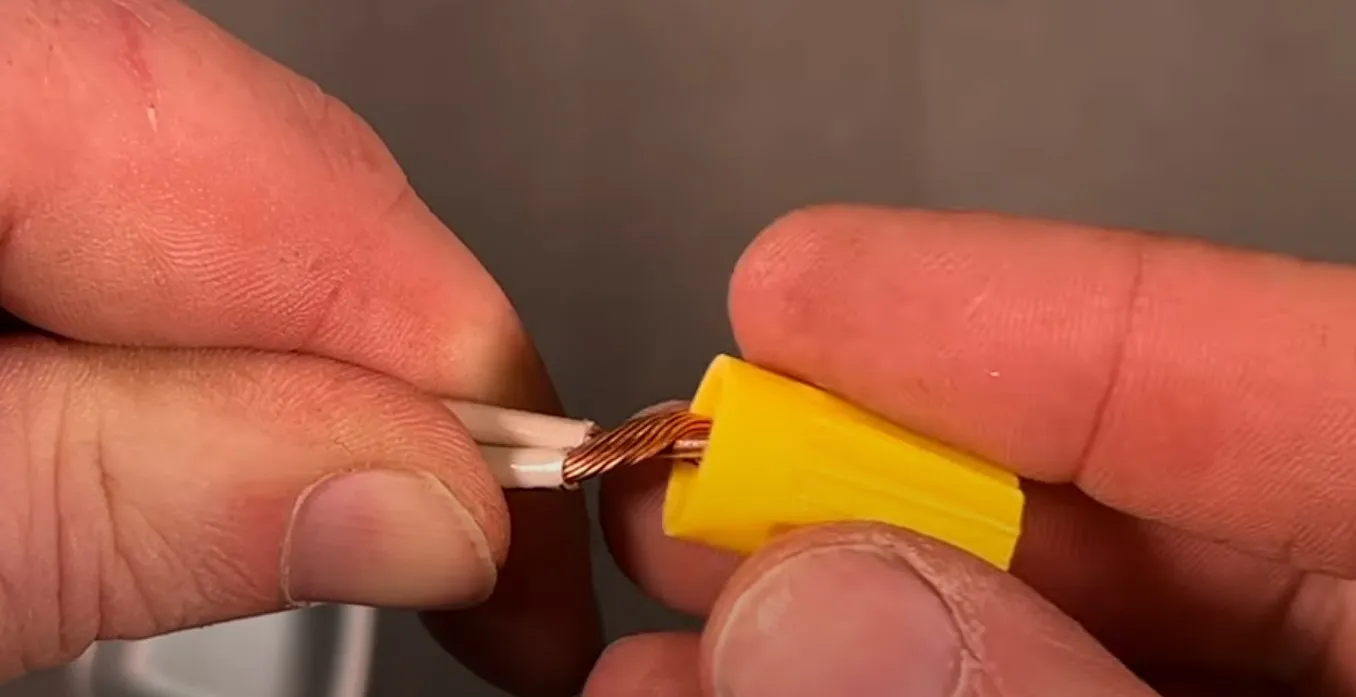
For each wire:
Hold the fixture wire and house wire together so the bare copper ends are aligned and the same length
Push both wires into a wire nut while twisting the nut clockwise
Tighten the wire nut as much as possible—it should be very snug
Test the connection by gently tugging on each wire—if either wire pulls free, remove the nut and reconnect
Critical Safety Note: Loose connections are a serious fire hazard. Take your time to ensure every connection is tight and secure. If wires keep slipping out of the wire nut, try twisting the bare copper ends together first, then adding the wire nut.
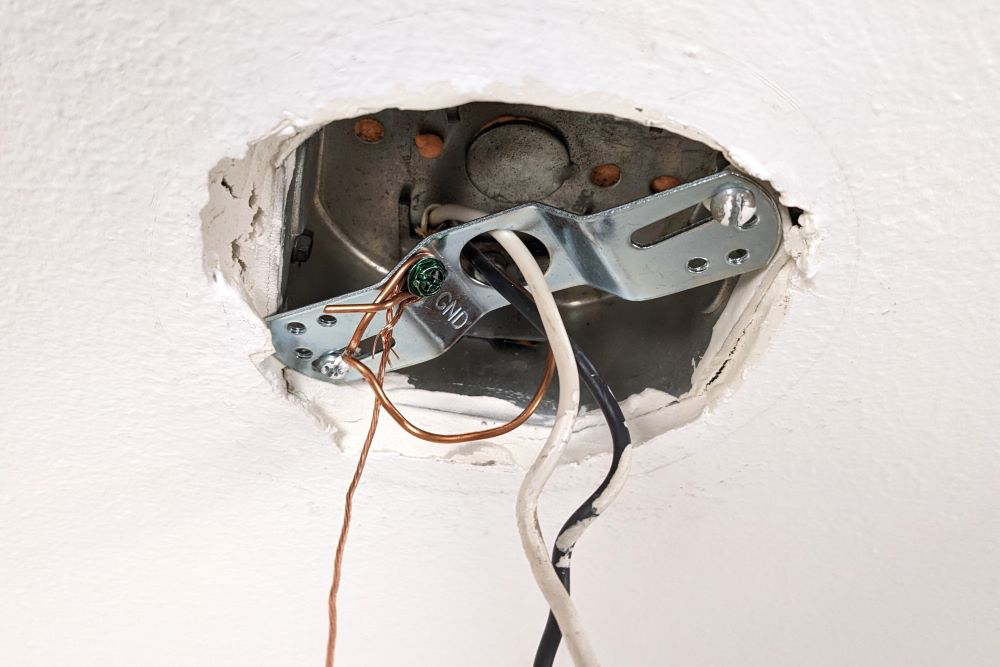
Special Case: No Ground Wire Present
In older homes, you may find only two wires coming from the ceiling or wall—the Hot wire (black or red) and the Neutral wire (white). There's no Ground wire (bare copper or green).
Don't Skip the Ground Connection
Your new fixture still needs to be grounded for safety. Here's what to do:
Locate the green grounding screw on the mounting bracket (this bracket is attached to the metal electrical box)
Wrap the ground wire from your fixture around this green screw
Tighten the screw to secure the connection
This grounds your fixture through the metal electrical box, providing essential protection against electrical faults.
Step 7: Mount the Fixture
With all wire connections secure, you can now attach the fixture to the wall or ceiling.
Installation Steps
Carefully tuck the connected wires into the electrical box—don't force them, but make sure they're fully inside
Align the fixture base with the mounting bracket
Secure the fixture using the provided screws or mounting hardware
Install any glass shades, bulbs, or decorative elements according to the manufacturer's instructions
Step 8: Restore Power and Test
You're almost done! Now it's time to see your work in action.
Final Steps
Return to your electrical panel and flip the breaker back to the "ON" position (if you turned it off earlier)
Go back to the room and flip the light switch
Your new fixture should light up immediately
If the light doesn't work, turn the breaker off again and double-check all your wire connections. Make sure each connection is tight and that you've matched the correct wires together.
Troubleshooting Common Issues
The Light Won't Turn On
Possible causes:
Bulb is loose or burned out—try a different bulb
Wire connections are loose—turn off power and check all wire nuts
Wrong breaker was turned back on—verify you flipped the correct breaker
The Breaker Keeps Tripping
This indicates a short circuit or wiring problem. Stop immediately and consult a licensed electrician. Continued attempts could damage your electrical system or create a fire hazard.
Flickering or Dimming Light
This suggests a loose connection. Turn off power at the breaker and re-tighten all wire nut connections.
When to Call a Professional
While many homeowners can successfully replace light fixtures, some situations require professional expertise:
You're uncomfortable working with electricity
Your home has aluminum wiring (common in 1960s-1970s homes)
The electrical box is loose or damaged
You're installing a heavy chandelier or ceiling fan
Local code requires a permit for the work
You smell burning or see scorched wires
There's no shame in calling an electrician. Safety always comes first.
Conclusion: Enjoy Your New Lighting
Replacing a light fixture is a rewarding DIY project that can transform the look and feel of any room. By following proper safety procedures—turning off the power, testing wires, and making secure connections—you can complete this upgrade with confidence.
Remember these key points:
Always turn off power at the breaker when possible
Use an electrical tester to verify power is off
Connect wires in the correct order: Ground, Neutral, Hot
Ensure all wire nut connections are tight and secure
Never proceed if you're uncertain about any step
Need Professional Help with Electrical Work?
Our licensed handymen can replace any light fixtures you want! Contact us today for a free consultation or to schedule your electrical service appointment.